Sunday, December 26, 2010

Dec 23: Dining Room Steel Frame Erected

After about 6" of freshly fallen snow is shoveled off of the slab and roof, building continues.


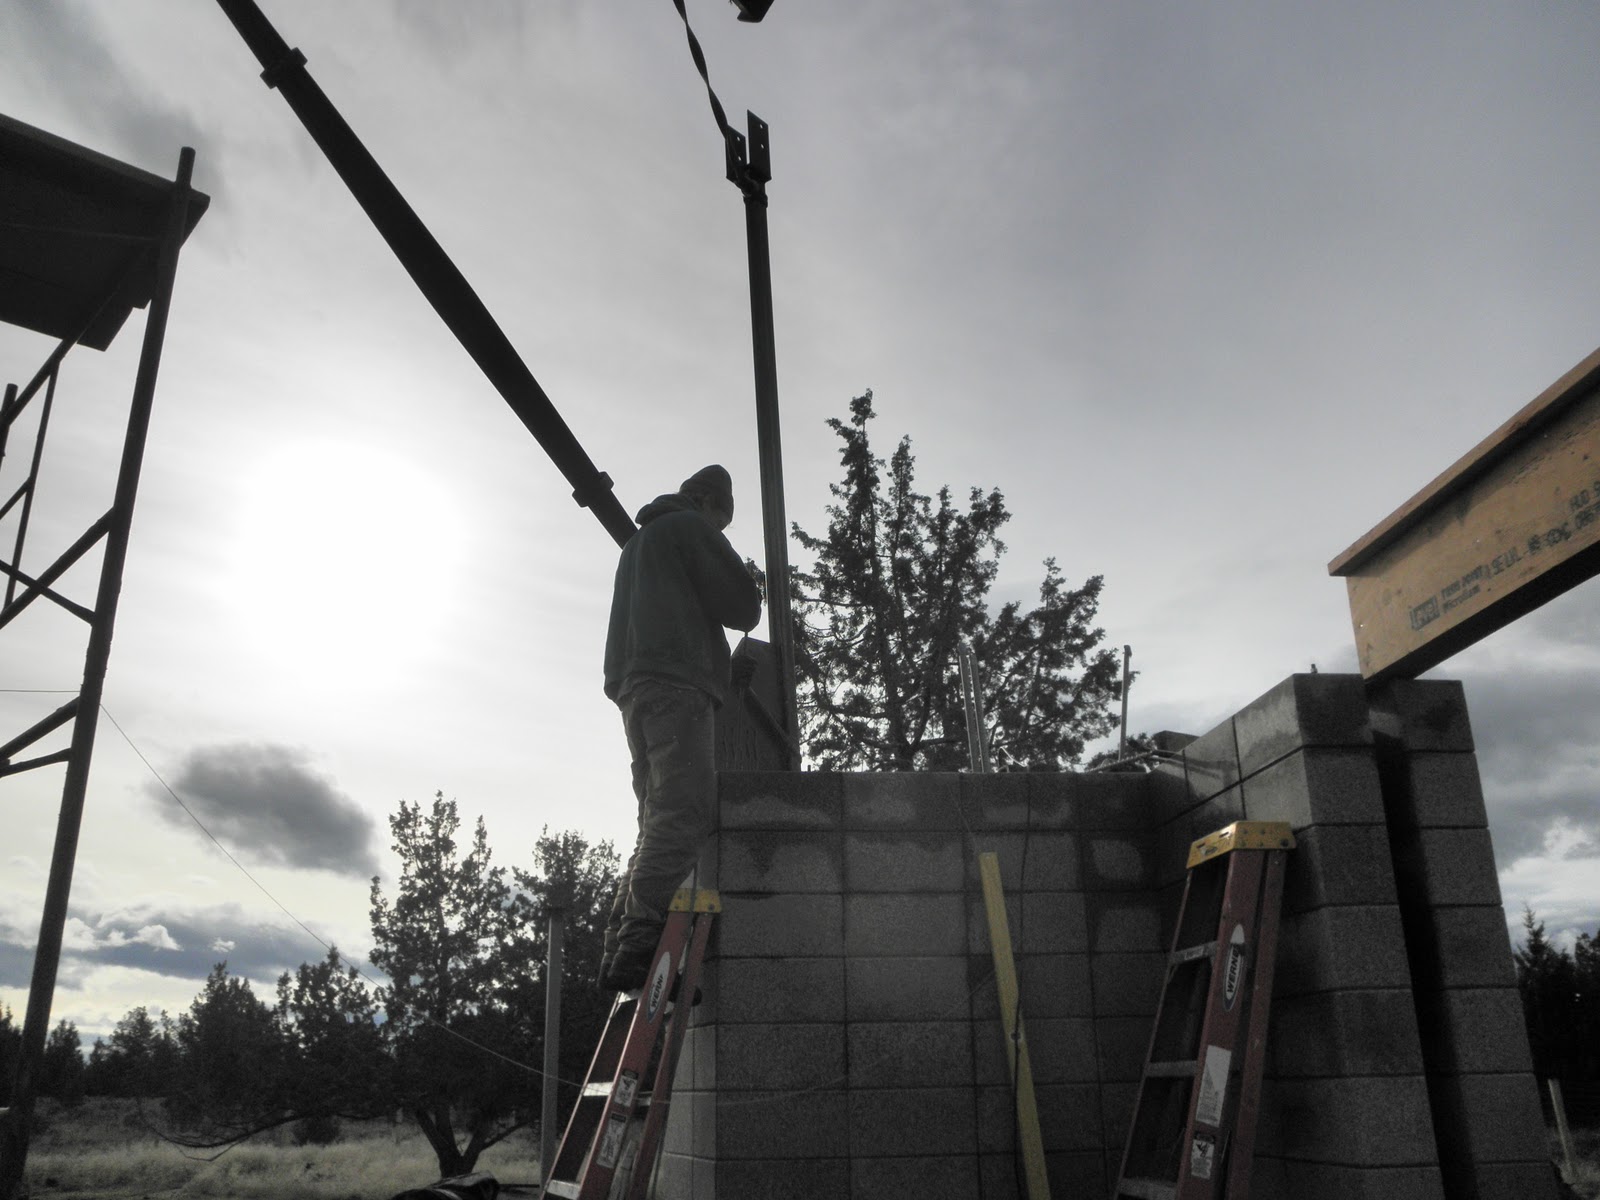
Two 4x10 steel beams are welded together on top of 3x3 tube steel posts to support the Dining Room SIP roof and glass curtain walls that will surround it on two sides, above and below.


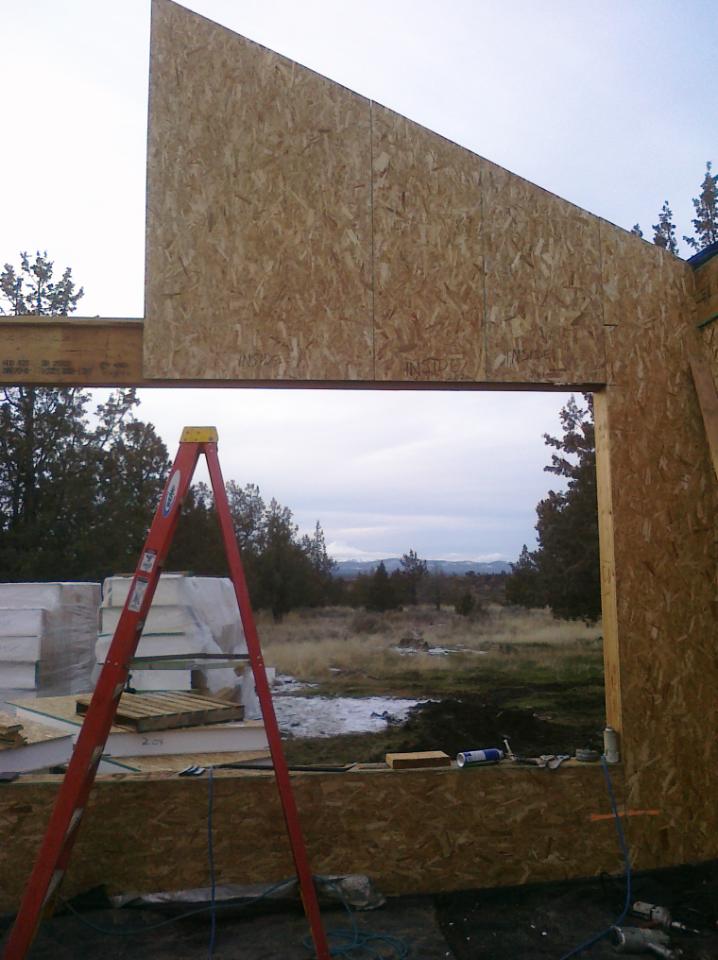
Upper wall SIP's are discovered to be incorrectly cut by the manufacturer, below.


Below, an upper wall SIP wall has some of the core removed to correct a manufacturer's cutting error.


Correction to upper SIP wall is made and installed, below.


Monday, December 20, 2010

Dec 17: (continued) Cable Truss Assembly & Upper Walls


The Cable Truss Saddle is bolted to the hip beam with a restraining cap, above and below.


Upper wall SIP's are installed on top of the double concrete block plate, below.


The Living Room window LVL header is secured to the concrete block wall with a custom steel angle connection and is straddled by upper wall SIP's, below.


Friday, December 17, 2010

Dec 16-17: Hip Beam & Upper Walls Erected


A cantilevered hip beam soars over the construction site after being driven into a close tolerance boot welded to the the Main Cable Truss Post.


The Cable Truss Assembly is hoisted into position on top of the double concrete block wall with straps attached to the boom on the Gradall.


Gradall hoists an upper level SIP wall into place on top of a header that spans across the Living Room window opening, above and below.


A view of Mt. Jefferson is hidden by clouds, beyond.


Monday, December 13, 2010

Dec 13: Primary Truss Strut Assembly Erected

The Primary Truss Strut Assembly is delivered to the job site after being welded together in the shop. The headset for the Primary Truss Strut will be attached to 7 structural members, as shown in the following two photos.  At the base of the Primary Truss Strut Assembly is welded the Base Plate Knife Connector.


A seat is ground smooth and made level on top of the block wall in the LIving Room for installation of the Base Plate Knife Connector, shown in the following two photos.


The Base Plate Knife Connector is bolted to the block wall.  The bolts are drilled and epoxied into the wall and will be allowed to cure before the remaining Cable Truss Assembly is installed tomorrow.


Dec 7-9: Fascia Installed

Billy attaches LVL  blocking to the edge of the SIP roof to nail the LSL (laminated strand lumber) fascia in place for a smooth curve, above and below.


Fascia is shown attached to the SIP roof, photos below.


Brooding clouds are a constant reminder of ensuing winter weather and the roof that needs to be finished ASAP.


Monday, December 6, 2010

Dec 2-3: SIP Flat Roof Installed

With structurally insulated panels (SIP's) staged and stacked in the foreground, a crane is used to hoist the roof panels into place, left.

Looking forward to the arrival of guests, Lotte sweeps the Guest Bedroom slab floor as the last SIP is lowered onto the roof of the Guest Bedroom Wing, above.    

Brian, SIP consultant, scrambles to retrieve a SIP spline from a stack of laminated veneer lumber (LVL), left. For this project, the SIP splines serve a dual purpose:  a means of joining adjacent SIP's together and providing structural support, left

An LVL spans between SIP wall and concrete block wall to frame the opening for the Living Room window.  

SIP consultant, Michael,  drills a hole through a SIP to install the hoisting hardware, left.

Michael attaches the cane's hook to the hardware, left.


On the roof, Billy guides  a SIP wall segment into place, left.

The Guest Bedroom slab floor is swept and ready for guests, left.


The following day, Dec. 3rd, was a clear sunny day.  Todd decided to switch to a Gradall instead of a crane for lifting SIP's into place on the roof.  In spite of recommendations by SIP manufacturers that a crane be used,  the crew discovered that a Gradall worked better, and is less expensive, above and below.


On Saturday, Dec. 4th, it snowed  2".


The flat roof is in place, but the  sloped roof over the living area remains to be installed with panels staged and stacked, above and beyond, framed by the Living Room window opening.


The flat roof will be tarped to protect it from the approaching winter storm front.  At the next opportunity, the sloped roof will go up with good weather.


Sunday, November 28, 2010

Nov 24: On-site Structural Welding

"The Winged Victory of Terrebonne", the headset for the Main Cable Truss Post is welded in place and is shown sprayed with a rust inhibiting red primer.  The Hip Beam Boot is shown angling upwards above a beam shear tab to the left, a beam saddle to the right, and a tab, which passes through the Main Cable Truss Post, for the Primary and Secondary Cable Connections located directly below the boot.  These are the most important connections for the roof and will take the greatest forces in the structure.

Below, an assistant to Jim, the welder, sights along the Hip Beam Boot to check alignment with the Base Plate Knife Connector on the opposite side of the Cable Truss span.


The Base Plate Knife Connector, cut from steel 7/8" thick, is positioned in place where it will be bolted to the double concrete block wall, below, as shown on the drawings.


With fresh snowfall and temperatures hovering in the teens, Jim welds a beam seat to a tube steel post located in the corner of the Dining Room, below.


Todd says the photos on this post were all he was able to take today because the lithium batteries in his camera froze!  Stay tuned for more to follow after his batteries thaw out.


Wednesday, November 17, 2010

Nov 16: Framed & Double Block Walls Finished. Curved Block Wall Begins

Walls being framed lay on their sides on the Kitchen and Living Room stained slab floor.  Kitchen Island view of Mt. Jefferson, obscured by clouds beyond.

Master Bedroom 2x6 walls have  double 2x4 staggered stud framing for peaceful slumber.

Hallway between Master Bedroom and Utility Room.

.Master Bedroom with Den, beyond

Lotte stands on the stem wall along the south edge of the Dining Room.  The double block wall and Master Bedroom Wing framed wall stand finished, beyond.

Lotte inspects the double block wall with Brad.

How do you build with blocks that are not square? You build Egyptian style and cut and grind each block by hand so that it's square.  Although the blocks were ground smooth, with bevelled edges, at the factory.  Brad discovered that almost all of the blocks delivered to the job site were not square, which required a great deal of work on his part to cut and grind each block to compensate for a serious problem  [,and without the benefit of the hordes of Egyptian slaves that built the pyramids, also one block at a time.]

Lotte inspects the space in the middle of the double block wall, which will be filled with Icynene Spray Foam insulation for thermal efficiency and comfort.

Brad begins work on the curved concrete block wall in the Guest Bedroom Wing.

Dry-stacked blocks staged for wall construction in the Guest Bedroom Wing.

Four courses of block are dry-stacked and ready for the cores to be filled with concrete in the morning.