Sunday, November 28, 2010

Nov 24: On-site Structural Welding

"The Winged Victory of Terrebonne", the headset for the Main Cable Truss Post is welded in place and is shown sprayed with a rust inhibiting red primer.  The Hip Beam Boot is shown angling upwards above a beam shear tab to the left, a beam saddle to the right, and a tab, which passes through the Main Cable Truss Post, for the Primary and Secondary Cable Connections located directly below the boot.  These are the most important connections for the roof and will take the greatest forces in the structure.

Below, an assistant to Jim, the welder, sights along the Hip Beam Boot to check alignment with the Base Plate Knife Connector on the opposite side of the Cable Truss span.


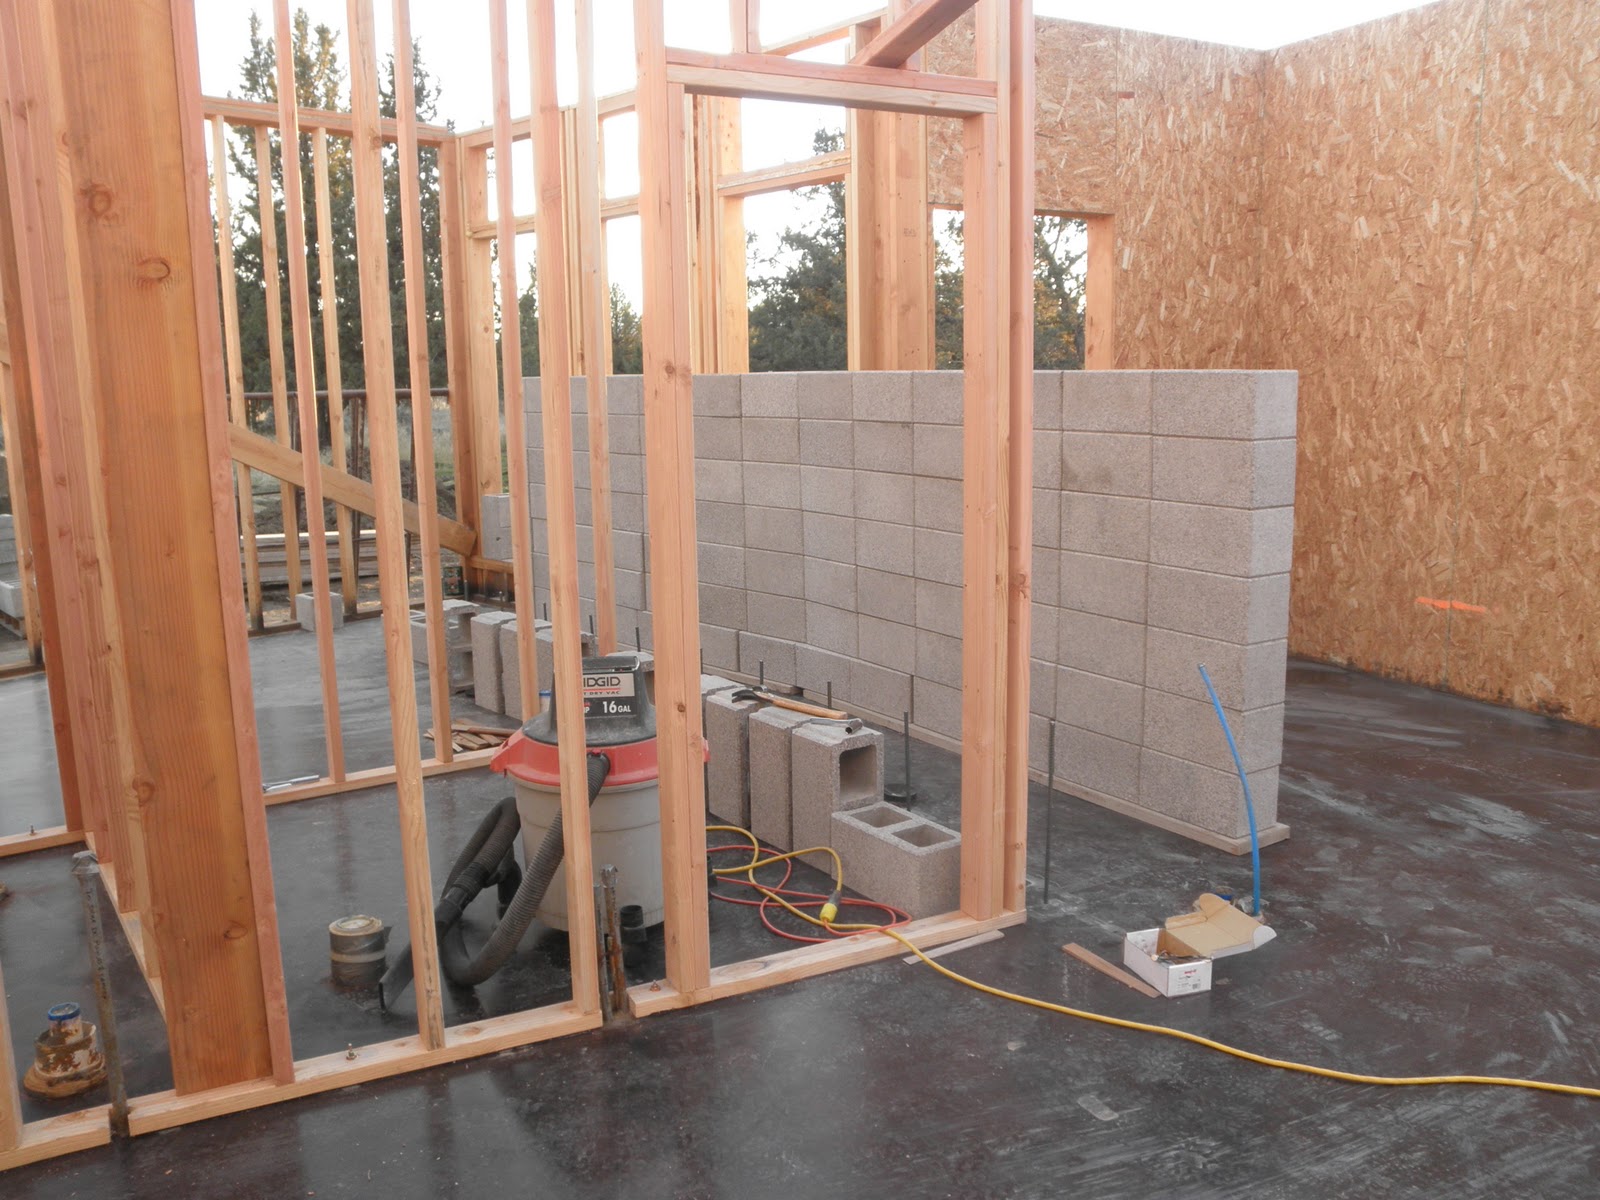
The Base Plate Knife Connector, cut from steel 7/8" thick, is positioned in place where it will be bolted to the double concrete block wall, below, as shown on the drawings.


With fresh snowfall and temperatures hovering in the teens, Jim welds a beam seat to a tube steel post located in the corner of the Dining Room, below.


Todd says the photos on this post were all he was able to take today because the lithium batteries in his camera froze!  Stay tuned for more to follow after his batteries thaw out.


Wednesday, November 17, 2010

Nov 16: Framed & Double Block Walls Finished. Curved Block Wall Begins

Walls being framed lay on their sides on the Kitchen and Living Room stained slab floor.  Kitchen Island view of Mt. Jefferson, obscured by clouds beyond.

Master Bedroom 2x6 walls have  double 2x4 staggered stud framing for peaceful slumber.

Hallway between Master Bedroom and Utility Room.

.Master Bedroom with Den, beyond

Lotte stands on the stem wall along the south edge of the Dining Room.  The double block wall and Master Bedroom Wing framed wall stand finished, beyond.

Lotte inspects the double block wall with Brad.

How do you build with blocks that are not square? You build Egyptian style and cut and grind each block by hand so that it's square.  Although the blocks were ground smooth, with bevelled edges, at the factory.  Brad discovered that almost all of the blocks delivered to the job site were not square, which required a great deal of work on his part to cut and grind each block to compensate for a serious problem  [,and without the benefit of the hordes of Egyptian slaves that built the pyramids, also one block at a time.]

Lotte inspects the space in the middle of the double block wall, which will be filled with Icynene Spray Foam insulation for thermal efficiency and comfort.

Brad begins work on the curved concrete block wall in the Guest Bedroom Wing.

Dry-stacked blocks staged for wall construction in the Guest Bedroom Wing.

Four courses of block are dry-stacked and ready for the cores to be filled with concrete in the morning.


Thursday, November 11, 2010

Nov 9: Slab Sealed


On Tuesday, when Terry was prepared to declare the slab as being finished, it had received five coats of sealer from his airless sprayer. 


Needless to say, we are quite happy with Terry's work.  We are pleasantly surprised at the depth and variation he was able to achieve with the stain, as shown in the photos.  

Hail fell in the morning and gathered into beads of water on the slab, which was already charged with enough passive solar heat to melt the ice crystals.


In the meantime above, Brad, our mason, continues to work on the dry-stacked concrete block wall surrounded by a drop-cloth to protect the newly finished floor.

Sunday, November 7, 2010

Nov 7: Slab Stained


Left, Bryan and Lotte admire the stained slab floor through the opening for the Master Bedroom window.


Right, view of the stained slab drying in the Living Room, Kitchen, and Guest Bedroom Wing with rain bearing clouds approaching.  Todd sent me a text message warning from Bend, 30 miles to the south, that read, "Rain in Bend - sprinkling."

We were spared the disaster of rain while staining and sealing the slab because of our location between the rain shadow created by Mt. Jefferson, the second highest peak in Oregon, to the west and the heat bubble created by the high south facing cliffs at Smith Rocks nearby to the east.  Todd and Terry have learned how much they can push their reliance on our local weather anomaly based on a comparison with Bend weather conditions. 


At sunset, while rain clouds continue to gather and the temperature plunges into the 30's, Terry and his assistant, below, will spend about an hour applying a second and final coat to seal the slab floor.  He will rely entirely upon the day's passive solar heat that has been stored in the slab to dry the sealer.  After that, he'll call it a day.


Friday, November 5, 2010

Nov 3: Slab Washed

A full 28 days is required to allow the slab to cure before it can be stained.  This allows moisture to dissipate from the slab, which would otherwise reduce the effectiveness of the acid stain in penetrating the surface of the slab.   Above and below, the concrete block wall is masked prior to washing and staining the slab.


The key to a well stained slab is a clean slab that will not repel the stain.  The slab was washed for two full days from 7am to 10pm, as shown in the following video and photos:


Terry emailed me his photos after midnight when he arrived home.  It was a good day and a good night for washing a slab.  Terry says he likes the way water flows over a slab and can watch it for hours.  I think I could too.